On our first day for this module we were introduced to the digital media students and briefed on the module. In this module we will learn through playing with different pieces of equipment and facilities to gain skills and understandings of techniques. We will then collaborate on a project with the digital media students.
Living Room Presentation
Today we presented our prototype to the rest of the class and explained the journey of our project. We managed to load the 360 degree file into a VR headset as we wanted, which was amazing to see, since it was the first time that anyone in the group had been able to be fully immersed into the living room.
This was someone experiencing the prototype in full with an Oculus Rift headset.
Now that this project is finished, it gave our group a chance to talk about things that we would have liked to do differently or if we had more time. The main thing that we were upset about was that we had to upload the video in low quality simply to speed up render time. While the experience was not completely lost, it would have been nice to have a high quality render. Another thing that we would have wanted to do, was to make it more interactive, so the user can walk around. I do think that we will continue with this project because it would be a shame to not fulfill it’s potential. We want to add more textures to the room to give it more of an atmosphere, and hopefully, with access to the render farm, we can produce maybe an 8K render.
Virtual Reality Workshop
This workshop is one that I have really been looking forward to since I have always been fascinated by the concept of virtual reality.
We had a brief talk about virtual reality and were introduced to tiltbrush, which I had a lot of fun playing with. Coming to university, virtual reality was the thing that most excited me, and what I wanted explore more. So I am really glad that we are able to do that as part of our projects.
Tiltbrush was very fun to play with, and a great introduction into VR. I can definitely see the potential with using it as a tool, for instance, creating quick concept art and storyboarding. I very quickly got the hang of using the software, and was quickly able to start producing good artwork.
Living Room Virtual Reality Implementation
Our original idea was to present our living room as a virtual reality environment that people can walk around and experience. Unfortunately we’ve decided that that idea would be too difficult for us to achieve right now, since it would need to use game mechanics and skills that no one in our group is very confident with. It would also be problematic to render.
So we have now decided to show our living room as a 360 degree video. This means that we can still demonstrate this as virtual reality, and allow people to experience it. But it won’t be as immersive as we’d have liked, since the user will only be able to experience it from one point, rather than being able to walk anywhere.
This was a video tutorial I watched when I was researching how to produce 360 degree renders in Maya, and then how to publish them. I found this really useful as it explained a method of doing it using Adobe After Effects which is a piece of software that I am familiar with, but do need some practice with it.
This was a low quality render test made by another member in the group, so that we could quickly see if our method works; and if there is anything vital we need to change before spending time doing a full quality render.
Living Room Animations
Our living room is full of all kinds of futuristic objects and features and we want to be able to make them move to make the room seem more interactive.

So, there was my idea of having the coffee table rise from the floor which is something that I really wanted to see in the room.
The most obvious thing to have animated in a room is the door, so Oli’s task was to design and create the futuristic door for the living room.

We also had the idea to have some kind of AI robot that assists in the room, kind of like from Back to the Future, so we implemented that into the design.
Brandon created a really good design for a TV that hides in the wall which will definitely appear in the final prototype.
Overall as a group, I think everybody has committed a lot to the project and seems to be really passionate about it. Everybody has their unique take on it, and while there has been disagreements and arguments, there’s also been some really productive developments in the ideas.
Living room of the future concept drawings
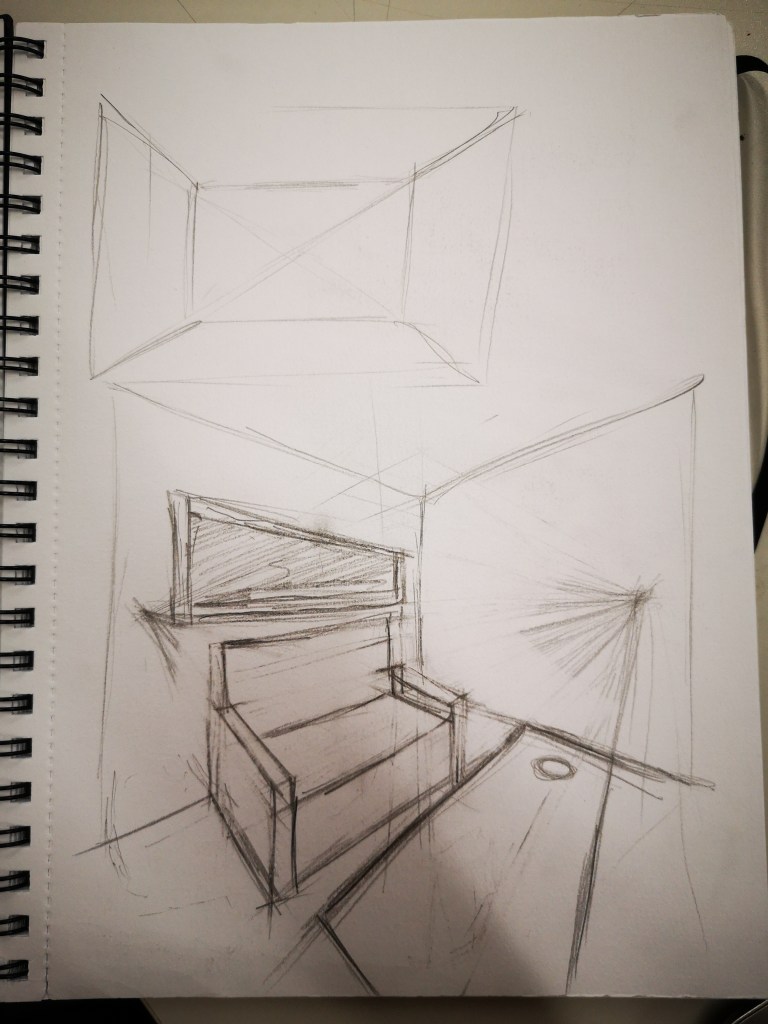
We decided as a group to assign tasks to each other over the past week to continue developing the project. My task was to produce some concept art for the living room. So I thought this would be a good excuse to practice my perspective drawing since interiors is something that I really enjoy drawing.
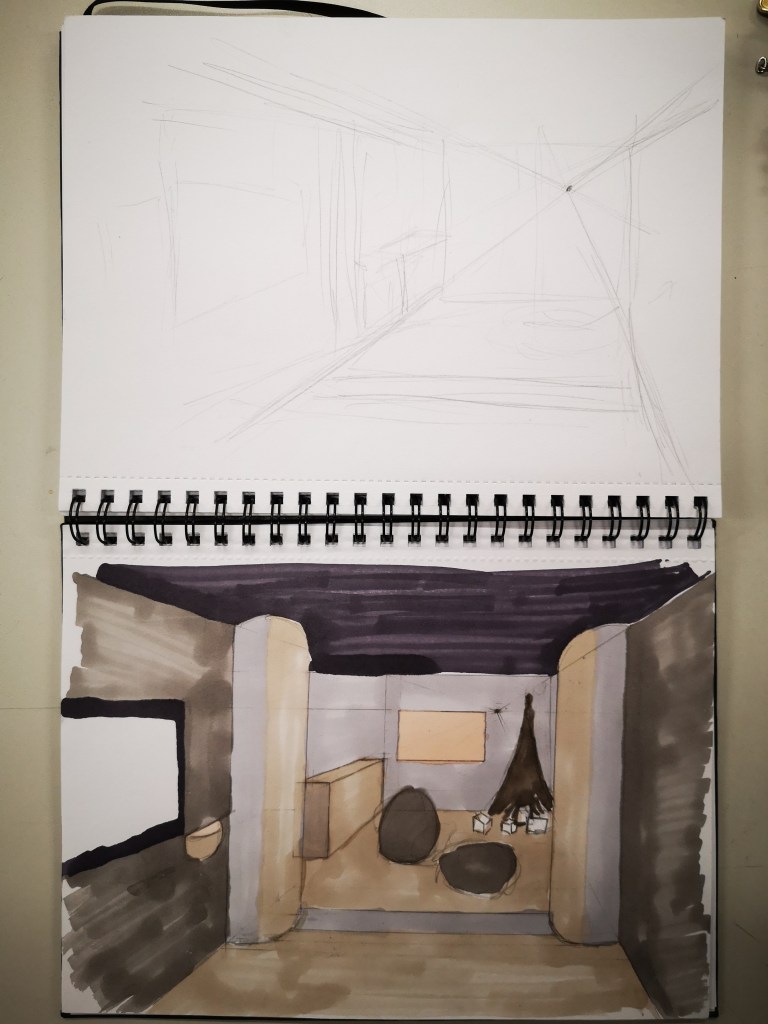

These concept drawings ended up being used to create our floor plan, and then a 3D model in Maya made by other members of the group.

Living Room of the Future
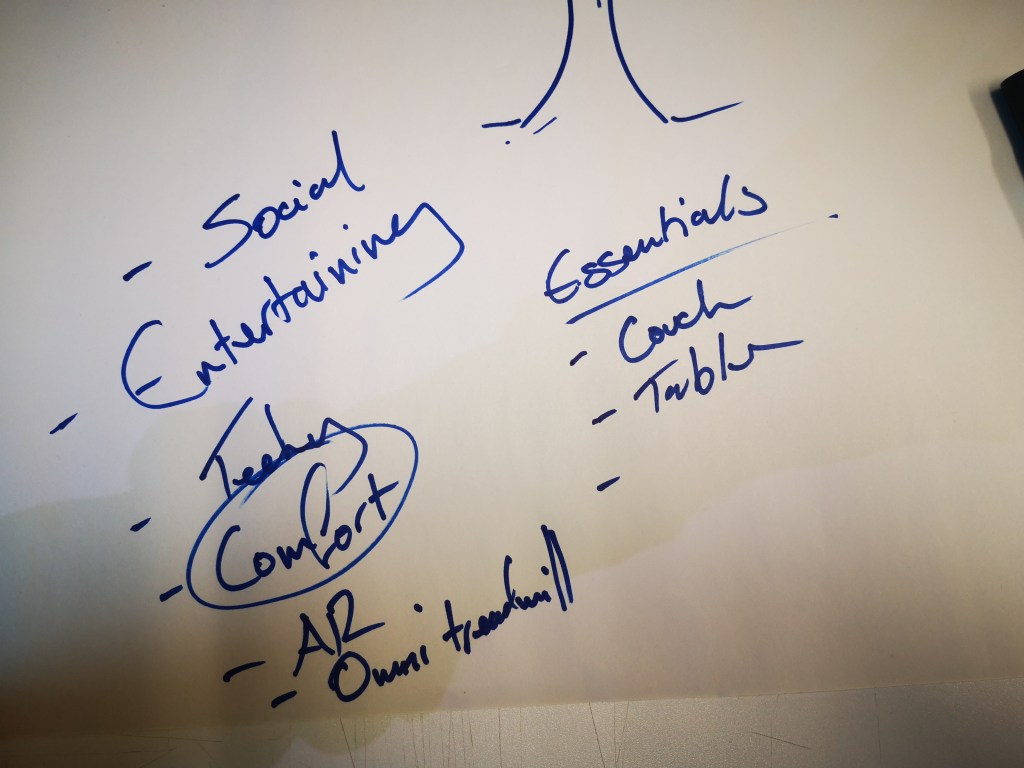
Today we created our groups and began our project for the living room of the future. Our first step was to brainstorm ideas on what we thought a living room of the future would be like.
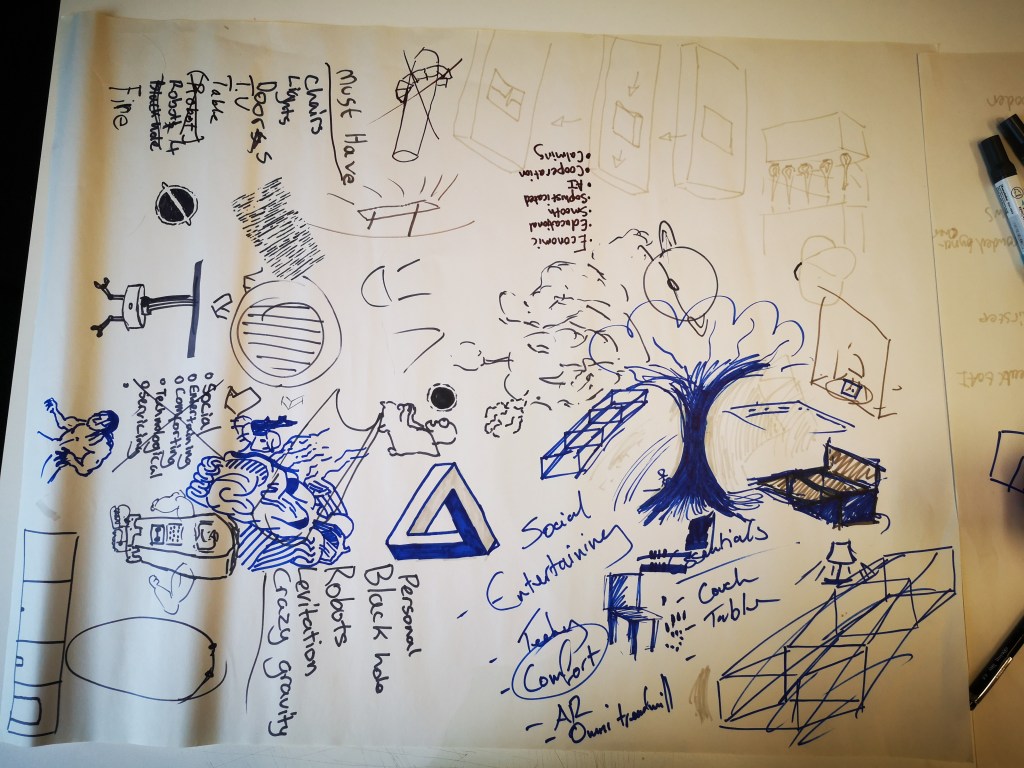


Here are some sketches i did to demonstrate some of my ideas of the room, such as the ceiling with the night sky display, the coffee table that rises from the floor, and the futuristic TV.
Something that really inspired us as a group was the virtual reality workshop. We very quickly agreed as a group that the most interesting way to present our prototype was through virtual reality. This means that we will have to create a 3D model of our living room and learn how to make it immersive.
Digital Puppets
In this session we looked at adobe character animator and how to animate using motion tracking.

I began by creating a character in Photoshop. It was very important how I organised the layers because I put it into character animator and the software had to be able to distinguish each element of the character. So, the arms, torso, head, and all the facial features had to be in different folders.

This is how I structured the file. I later went in and added more mouth shapes because I wanted to be able to lip sync the animation.
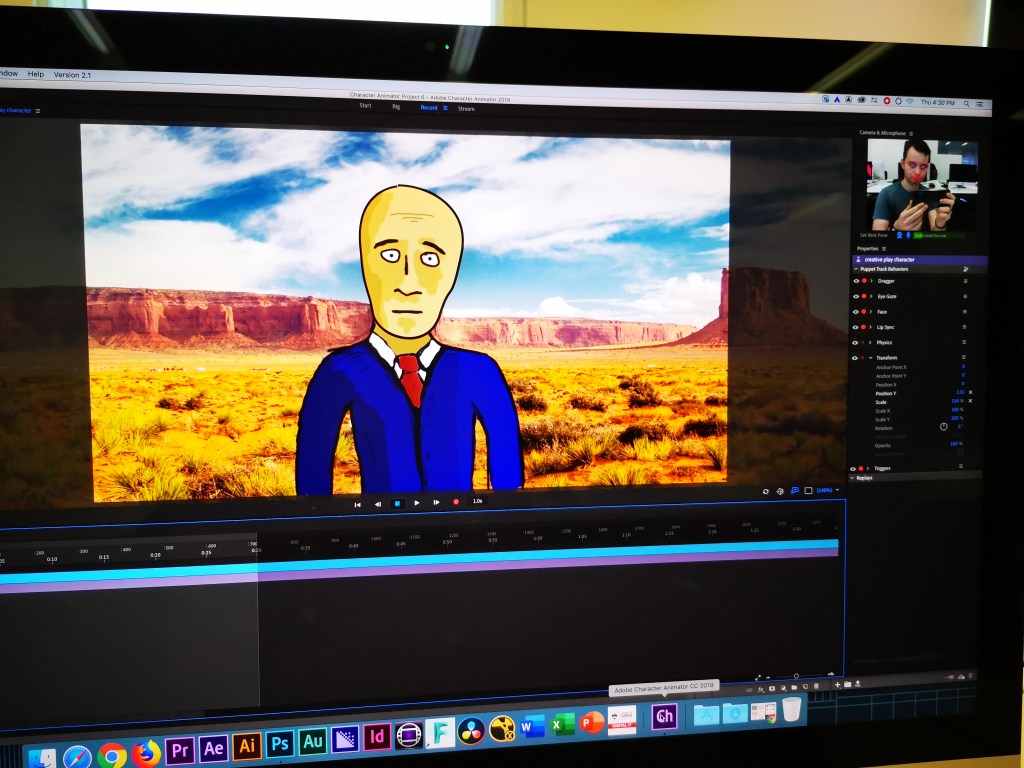
Doing this excersise taught me the basics of rigging a character, and anchoring points in animation. I find it really interesting how this technique of animating based on a live feed is used by real animated tv programs to speed up work flow.
Projection Mapping
Today we had a play with projection mapping. Projection mapping is not something that has ever really interested me, but after today I ended up enjoying experimenting with it much more than I thought I would.
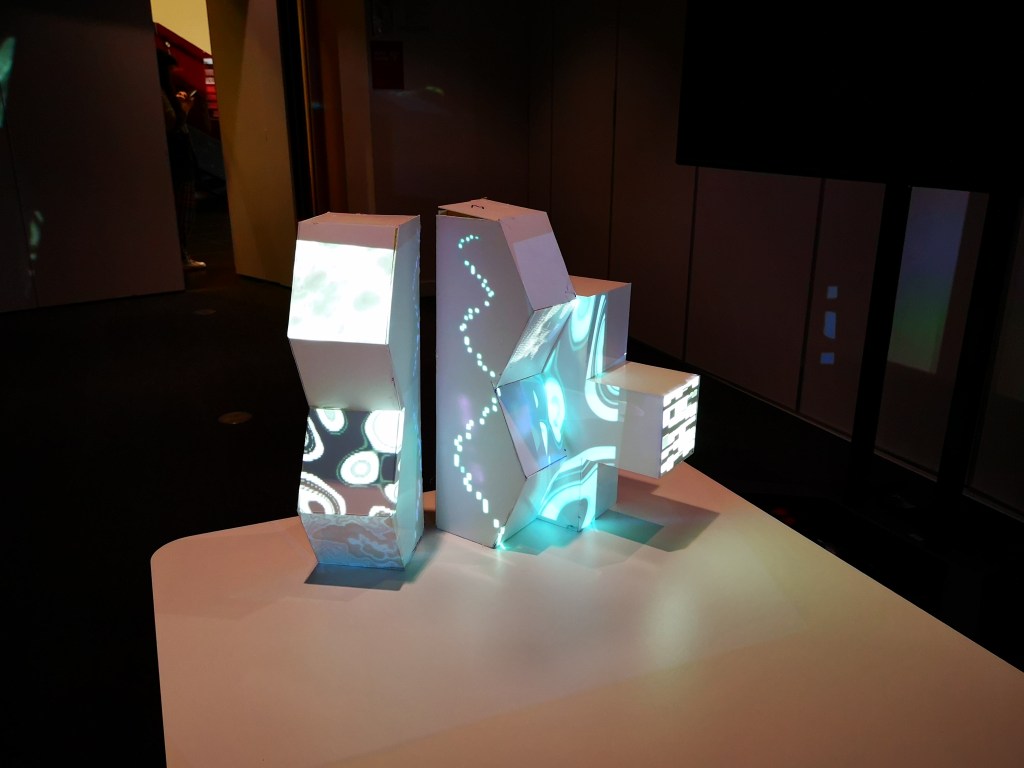
We began with a demonstration on what projection mapping is and briefly being taught how to use the software.
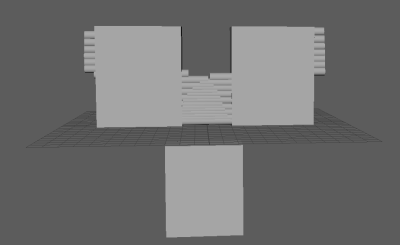
We then played around with different shaped blocks and arranged them so we could project onto them.
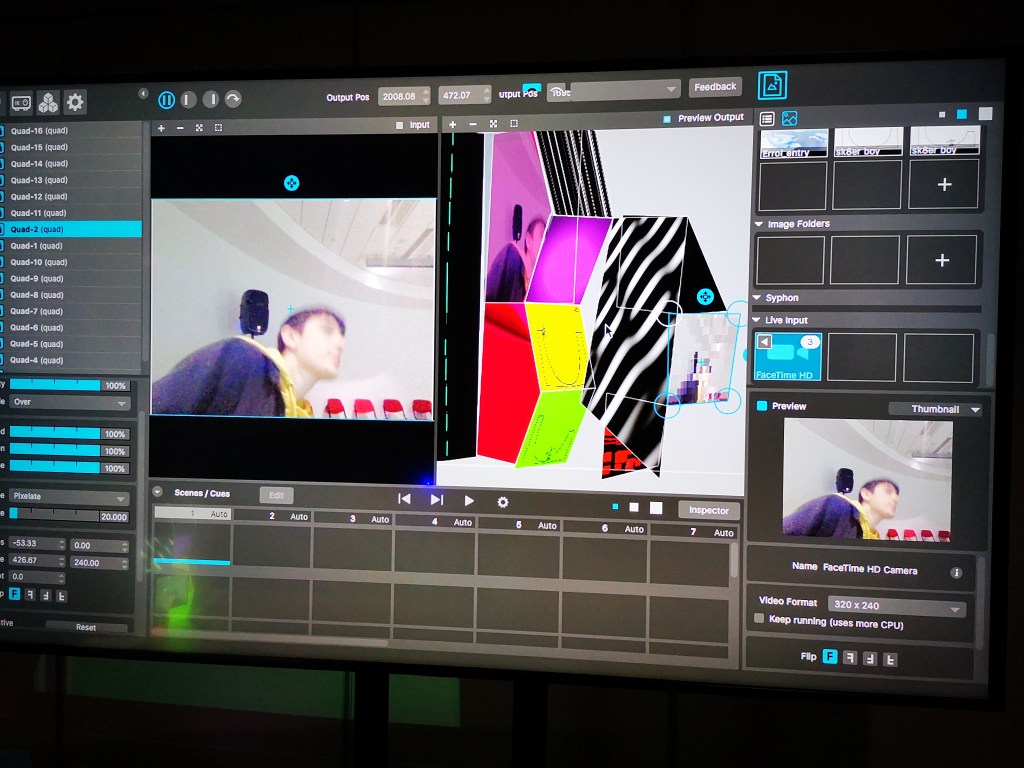
Because this was a new piece of software that I had never used before, I wanted to experiment with it and see how far it could go. In the settings I found that there were lots of possibilities for projecting animations, live feeds and all kinds of graphics.

Me and a Couple of others ended up staying in the room after the session and we got a bit carried away with what we were projecting onto the object. We discovered that we could play live music and set the graphics to respond and move to the music. We also managed to cast live footage onto the faces of the object as well.

One very powerful use of projection mapping that I saw was by Roger Waters on his recent Us and Them tour. During the show large pieces of set rise from the middle of the stadium and form the shape of a factory and then images are projected onto it. This stuck with me and showed me just how far projection maps can go and the potential they have.

Board Game prototype
In this session, we collaborated in groups to create a prototype for a board game. In doing this we learnt the value of prototyping, and knowing as a group which creative ideas to build on, and which to reject.
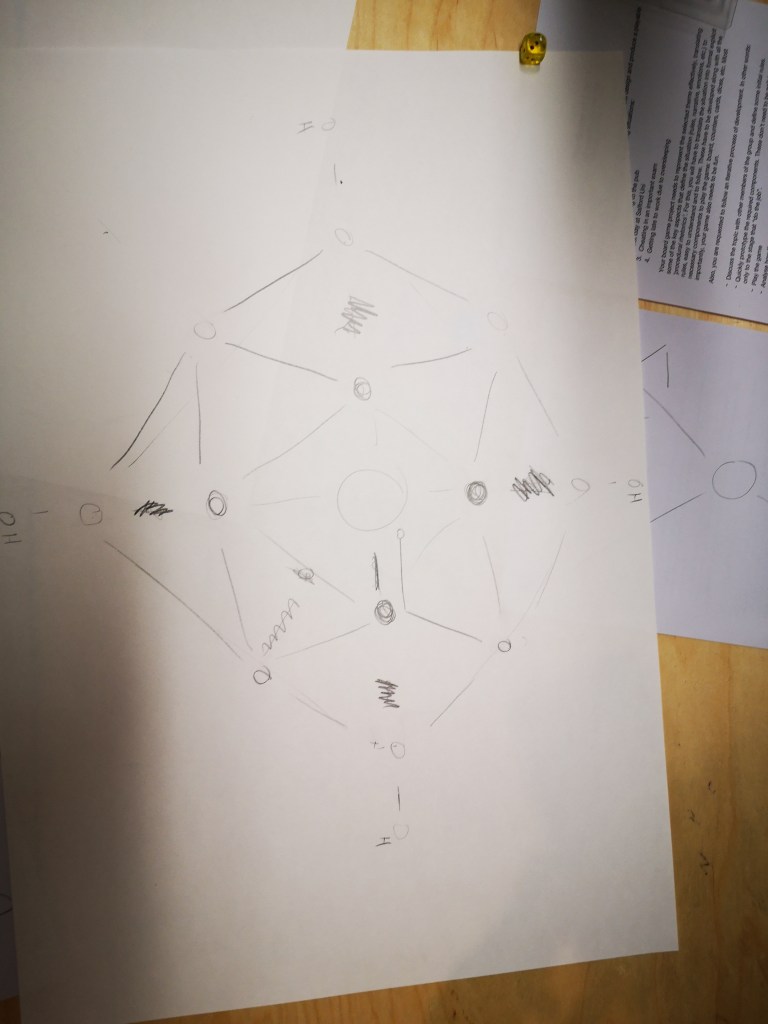
We began my brainstorming ideas for the board game and by talking about what kind of game we would want it to be. In the beginning we decided on it being a drinking game, but as the idea evolved, we eventually got rid of the drinking aspect. We wanted the game to allow the player to move their piece in any direction they like, so we went for a network style layout.
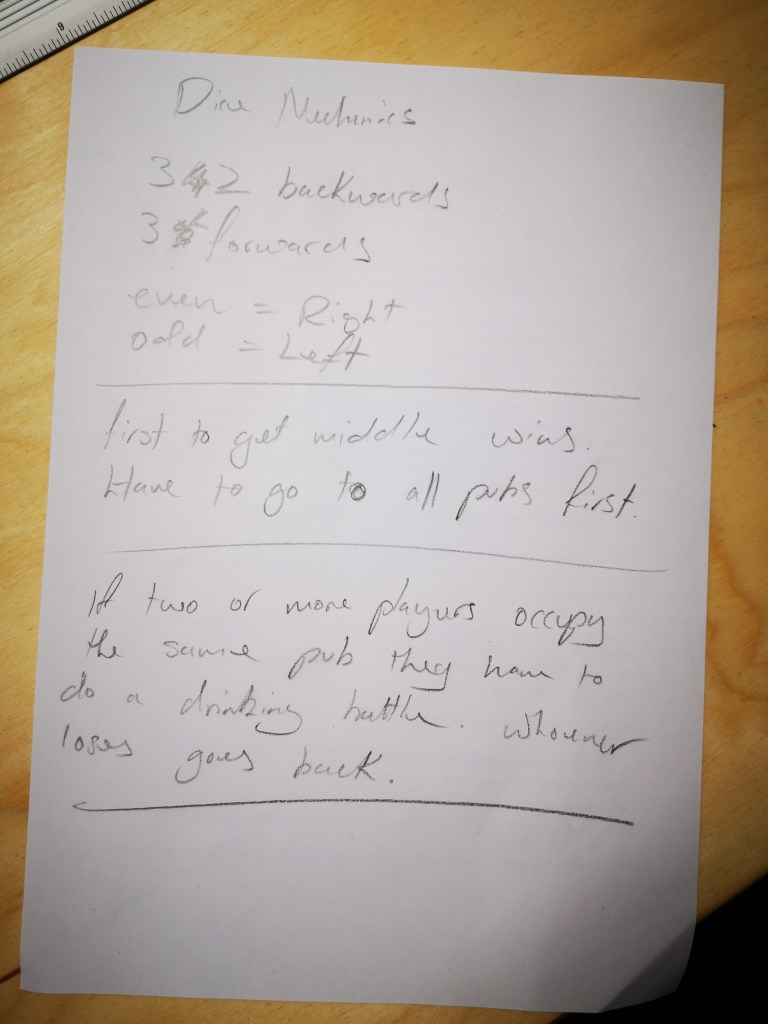

As we were going, we kept developing the rules and the mechanics of the game, and had to keep making lots of changes to both the layout of the game, and the rules.

Eventually, we came up with a basic, playable version of the game, which we tested on another group. This showed us an important part of prototyping, testing on people who have no knowledge of the project. In doing this, important problems became very apparent immediately concerning the complexity of the game. These issues would not have been noticed by our group because we understood the game. So testing the game on an exterior group proved to be very valuable.
Green screen and VFX
03/10/19 Today our group had our inductions in the green studio. There we learnt how to use and book out the facilities along with some techniques, terminology and origins of chromakey. Later we had a lecture on the history of VFX which added some much more in depth context to our greenscreen work.

A pioneer in visual effects was the French illusionist and film maker George Mellies. George Mellies was known throughout his life as a professional stage magician, and being a magician myself, George Mellies is someone who greatly interests me. He created the double exposure, which is a technique that paved the way in visual effects.

One thing we spoke about in the green screen studio while talking about the origin of chromakey was matte painting. Matte painting is something that has always fascinated me because of the technical skill involved with achieving the illusion.

On the topic of Matte painting, something that has always stuck in my mind is the work of Michael Pangrazio. He worked on the original Star Wars films, Indiana Jones films, and many other blockbusters. His amazingly convincing backgrounds demonstrate how effective the simple technique of matte painting was.
